Using this method, you can upload a picture that you've taken to the web site and display it directly from here.
Content Guidelines: To upload a picture on the website, it must be in .JPG or .PNG format, be no larger than 1MB in soze and the longest side of the picture must be no more than 2000 pixels long. If you don't know what these mean or if you find this too restrictive, please contact the webmaster.
Once you have your picture within these restrictions, proceed using the following steps:
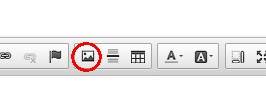
1. Press the Picture button in the editor toolbar.
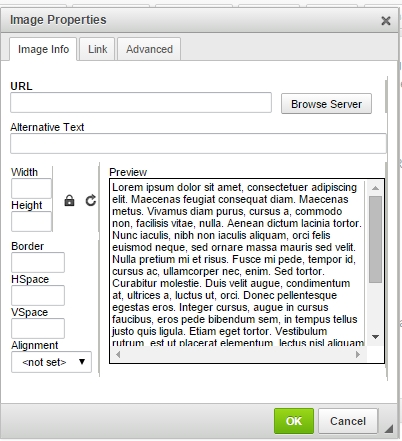
2. An Image Properties dialog will be displayed, similar to the one shown below. You are first presented with the Image Info tab. Press the Browse Server... button.
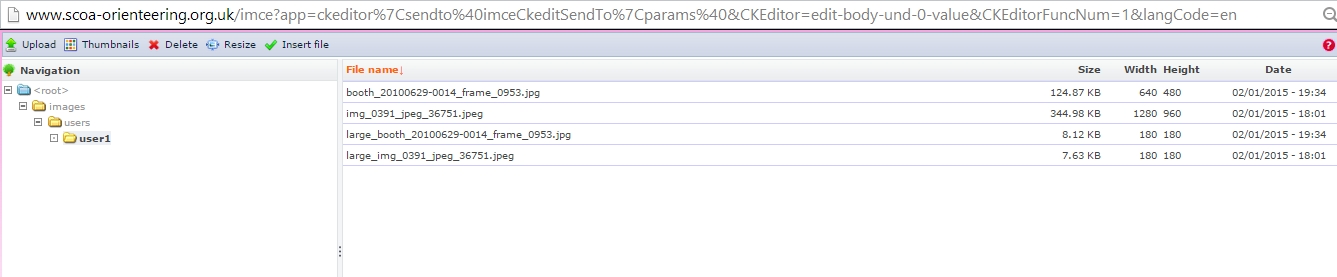
3. A File Browser dIalog will be displayed, similar to the one below. Each user gets their own space - this happens to be mine when I wrote this article, but if you haven't uploaded any pictures yet, yours will be empty.
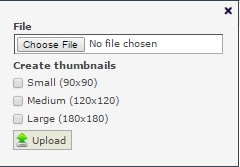
4. If the picture you want to use is already on the list of files on the server, then you can skip this step. Otherwise, you will need to upload the picture to the server. Press the Upload button and the dialog box below will be displayed. Press the Choose File button and select the image from your system - remember the Content Guidelines above! It is strongly recommended that you create a thumbnail for the image, and I recommend the large one, so tick the Large checkbox in the dialog. Then press upload - the file will upload and be displayed in the main File Browser window, shown above, with both the original file name and another with the file name preceded by _large (if you requested a thumbnail). Close the Upload dialog box.
5. Select the Thumbnail in the File Browser for the picture that you want to insert into your page (the picture will be displayed when you select it) - remember thatthe thumbnail for the image is preceded by _large in its filename. Press the Insert File button in the File Browser dialog. The full address of the thumbnail will appear in the URL field of the Image Properties dialog.
6. Close the File Browser dialog and return to the File Properties dialog - select the Link tab of the Image Properties dialog.
7. Press the Browse Server button on the Link Tab and the File Browser dialog will be displayed. Select the main file for the image you're uploading and press the Insert File button.The full address of the thumbnail will appear in the URL field of the Link tab of the Image Properties dialog.
8. Close the File Browser dialog and press the green OK button on the Image Properties dialog. The thumbnail for the image will be displayed at the current place in the edit box and you can carry on editing. When saved, pressing on this thumbnail will display the full sized version of the image.
9. You can edit the properties and names for the image by selecing the image while editing and pressing the Picture button in the toolbar.